

安装
- 更新源
sudo apt-get update
- 安装Apache
sudo apt-get install apache2
- 安装Mysql
sudo apt-get install mysql-server
中间会出现输入 Mysql 的 “root” 用户的密码
- 安装PHP
sudo apt-get install php5
sudo apt-get install php5-mysql
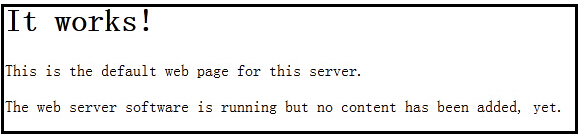
- 在浏览器输入Http://localhost测试效果,出现下图说明成功
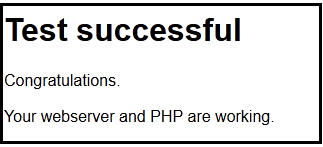
- 测试php,找到/var/www/index.html,修改为如下内容:
<?php
  print <<< EOT
<!doctype html>
<html lang="en">
<head>
<meta charset="UTF-8">
<title>Test successful</title>
</head>
<body>
<h1>Test successful</h1>
<p>Congratulations.</p>
<p>Your webserver and PHP are working.</p>
</body>
</html>
EOT;

?>
刷新浏览器,出现下图说明成功
添加安装源
sudo nano /etc/apt/sources.list
#Backports repository,在底部增加这行
sudo deb http://httpredir.debian.org/debian jessie-backports main contrib non-free
安装Zoneminder
sudo apt-get update
sudo apt-get install zoneminder
注意:添加新源运行apt-get update可能会出现类似错误
W: GPG error: http://httpredir.debian.org jessie-backports InRelease: The following signatures couldn’t be verified because the public key is not available: NO_PUBKEY 8B48AD6246925553 NO_PUBKEY 7638D0442B90D010
解决:执行如下命令添加KEY(来自PUBKEY 后面的IDS)之后,再运行apt-get update
sudo apt-key adv –recv-keys –keyserver keyserver.ubuntu.com 8B48AD6246925553
sudo apt-key adv –recv-keys –keyserver keyserver.ubuntu.com 7638D0442B90D010
参考:http://jingyan.baidu.com/article/2d5afd69ec4cce85a2e28ef9.html
阅读说明
sudo gunzip /usr/share/doc/zoneminder/README.Debian.gz
sudo cat /usr/share/doc/zoneminder/README.Debian
配置数据库
#导入数据库表
sudo cat /usr/share/zoneminder/db/zm_create.sql | sudo mysql –defaults-file=/etc/mysql/debian.cnf
#建立用户zmuser,设置密码zmpass,可更换为自己的
sudo echo ‘grant lock tables,alter,create,select,insert,update,delete,index on zm.* to ‘zmuser’@localhost identified by “zmpass”;’ | sudo mysql –defaults-file=/etc/mysql/debian.cnf mysql
配置zm.conf权限
sudo chgrp -c www-data /etc/zm/zm.conf
zoneminder加入服务
sudo systemctl enable zoneminder.service
配置Apache, 建立/zm虚拟目录。
sudo a2enconf zoneminder (失效的话手工建立链接)
sudo a2enmod cgi
sudo a2enmod rewrite
注意:sudo a2enconf zoneminder出现
pi@raspberrypi:/etc/zm $ a2enconf zoneminder
ERROR: Conf zoneminder does not exist!
解决:
sudo ln -s /etc/zm/apache.conf /etc/apache2/sites-enabled/zoneminder.conf
sudo ln -s /etc/zm/apache.conf /etc/apache2/conf-enabled/zoneminder.conf
配置PHP时区
sudo nano /etc/php5/apache2/php.ini
找到如下行,去掉date.timezone前的; 设置为上海时区Asia/Shanghai
[Date]
; Defines the default timezone used by the date functions
; http://php.net/date.timezone
date.timezone = Asia/Shanghai
启动Zondminder,要先重启Apache
sudo systemctl reload apache2 或 sudo service apache2 restart
sudo systemctl start zoneminder 或 sudo service zoneminder start
检查是否可用
通过浏览器打开 http://hostname_or_ip/zm,即可可能到控制界面
通过浏览器打开,http://hostname_or_ip/zm/api/host/getVersion.json,可看到
{
“version”: “1.29.0”,
“apiversion”: “1.29.0.1”
}
注意: 1.26.5版本,如果发现不能点击增加Add new monitor, 可能是JS设置不对
解决:编辑/etc/zm/apache.conf文件,定义javascript
Alias /zm /usr/share/zoneminder
Alias /javascript /usr/share/javascript (增加)
<Directory /usr/share/zoneminder>
php_flag register_globals off
Options Indexes FollowSymLinks
<IfModule mod_dir.c>
DirectoryIndex index.php
</IfModule>
</Directory>
之后重启Apache
sudo systemctl reload apache2

没有评论内容